Forming the screen shape
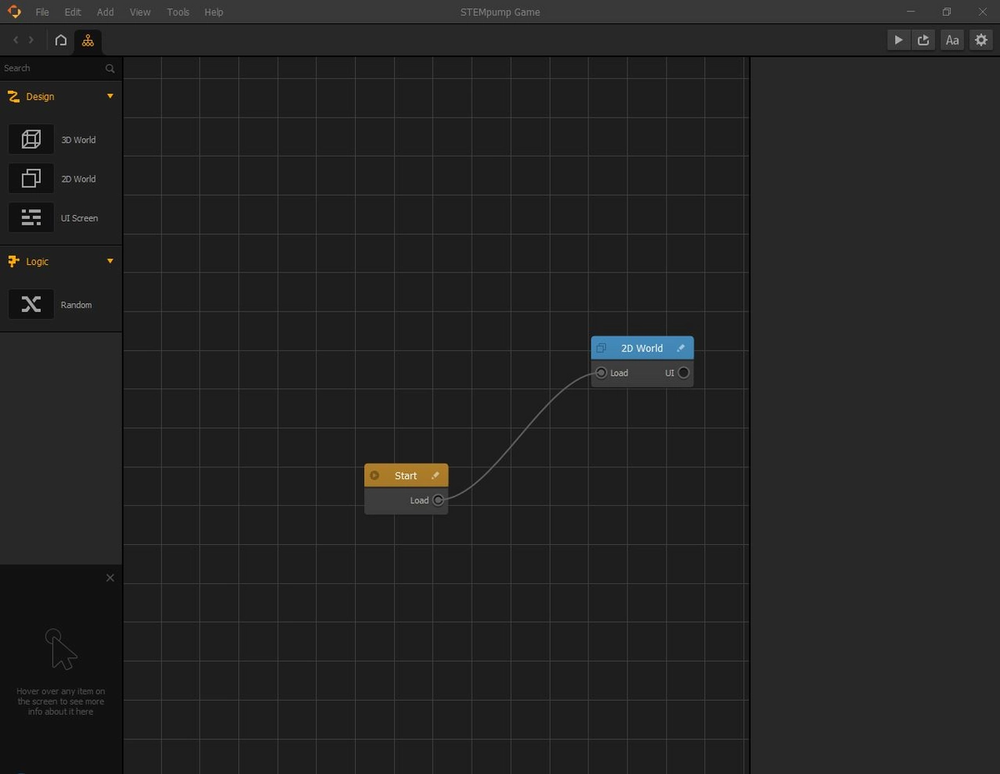
This is called the "Mind Map". In Buildbox, the Mind Map is used to demonstrate the flow of the game when a user plays it. This is how you would organize a game with multiple levels, show loading screens, main menus, etc. Basically, the Mind Map can be thought of as the "glue" that puts all the different scenes you make together to make the overall game.
We are going to double click on the "2D World" block, and your screen should look like this:
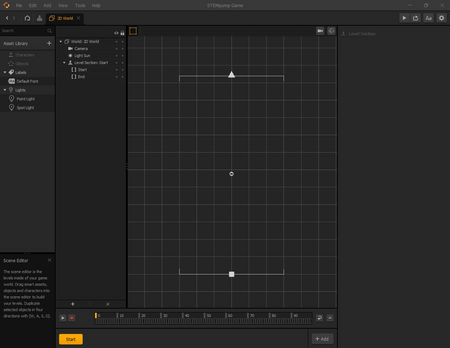
Since our game is going to go left to right, we need to change the start and end points of our scene, which are currently moving top to bottom. To do this, click on the square (the start point) and on the right hand side, change the position of X to be -11 and the position of Y to be zero. You can also do this manually by dragging the green arrow to alter the Y-position and dragging the red arrow to change the X-position. We also want to set the rotation to -90 degrees. This can also be done manually by dragging the circle around the square to the desired angle.
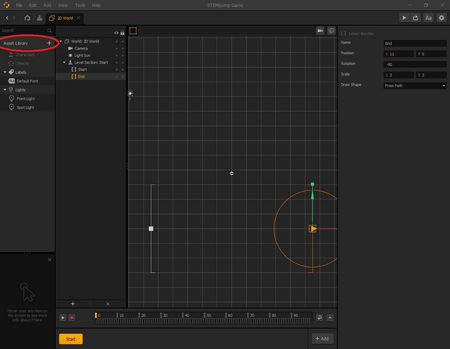
Now, we want to do the same thing to the triangle (the end point). Here, we want the X-position to be 11 and the Y-position to be zero. The rotation should also be at -90 degrees.
Adding assets to the environment
Now that our level shape is made, we can add some assets that will give our level some vibrancy, so it's not just an empty space. To do this, click on the "Asset Library" shown here.
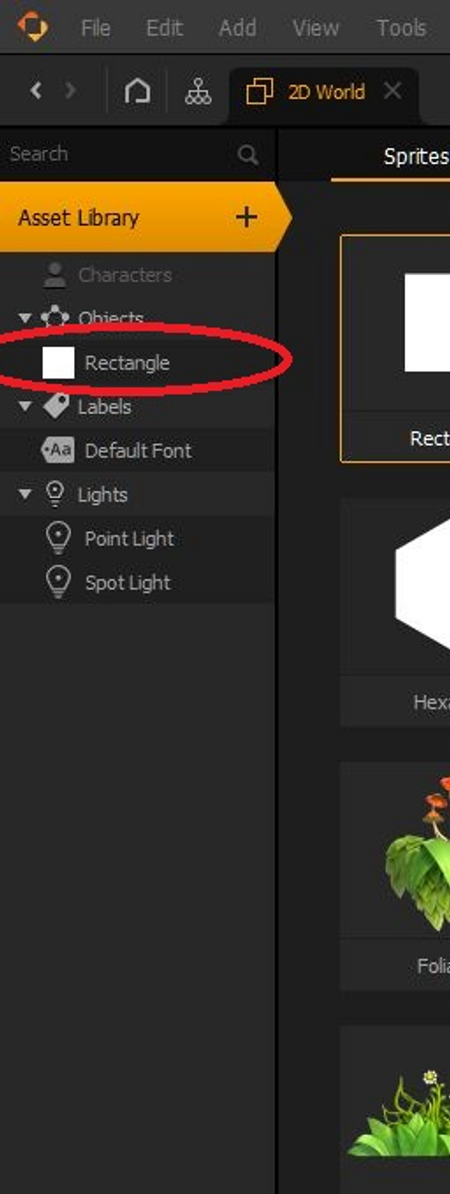
As you can see, Buildbox has a large variety of assets, 2D or 3D, that you can use in your game. For now, we are just going to use a simple rectangle (the very first asset listed). To use this asset, double-click on "Rectangle". You will notice that "Rectangle" has now been added to your library, under Objects, here:
Next, click on the "Asset Library" button again to close out of it and return to the level editor.
We want to rename our "Rectangle" asset, so it can be more identifiable. To do this, click on the "Rectangle" tab under your Objects tab once, then, go to the right and rename it "Ground".
To change the color of our "Ground" asset, simply click on the "Color" bar directly below the "Animation" tab. You can choose whatever color you would like to have.
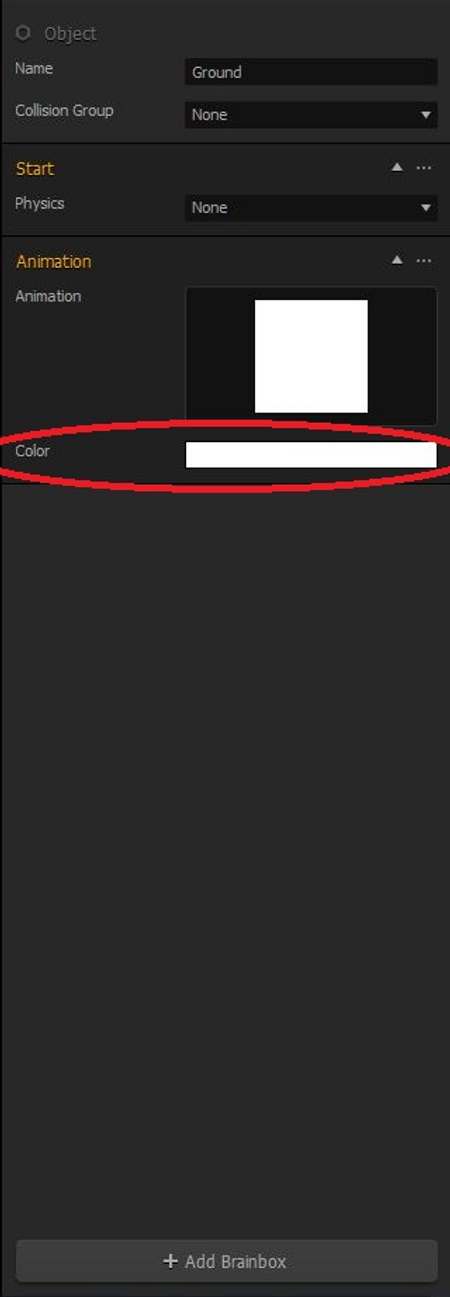
Some versions of Buildbox require all assets to have 3D models, even if they are 2D. In order to accomplish this, double-click the "Ground" panel on the left-hand side, and you will be brought up to a screen that looks like this:
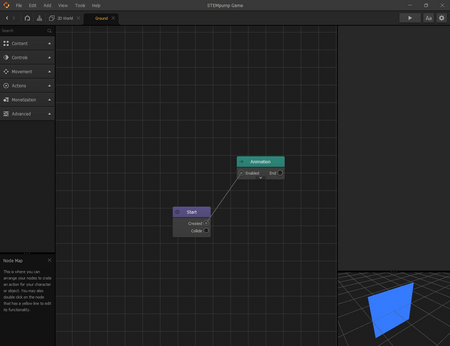
We are going to select the green "Animation" node and press the "Delete" key on our keyboard to, you guessed it, delete the node from the "Ground" asset. This gets rid of the plain white image of the asset. Even though we changed the color of our asset before, the game would have shown a white ground in the game, regardless.
On the left side, click the "Content" tab, and drag the "3D Model" node under the "Content" tab to the grid.
Inputs and Outputs
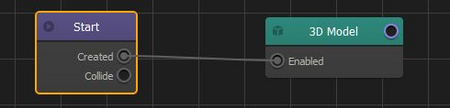
You probably notice that our nodes have these circles either on the left or right side of them. For example, the "Start" node has a circle on the right side, named "Collide". These circles are how you link one node to another, and this is the exact same way you link levels and different screens together in the Mind Map.
The circles that are on the right side of a node are the outputs of that particular node, while the circles on the left side of a node are referred to as the inputs of the node.
To connect the "Start" node to the "3D Model" node, we will drag a link from the "Created" output from the "Start" node to the "Enabled" input of the "3D Model" node. This, in turn, should end up looking like this:
Adding Planes to Objects
Now that our "Ground" asset is linked with our "3D Model" node, we need to add a plane to our asset, so that it is actually visible to us and the player.
To do this, click on the "3D Model' node to select it, if it is not selected already, and hover your cursor over the picture with an up arrow in the "Mesh" section on the right side.
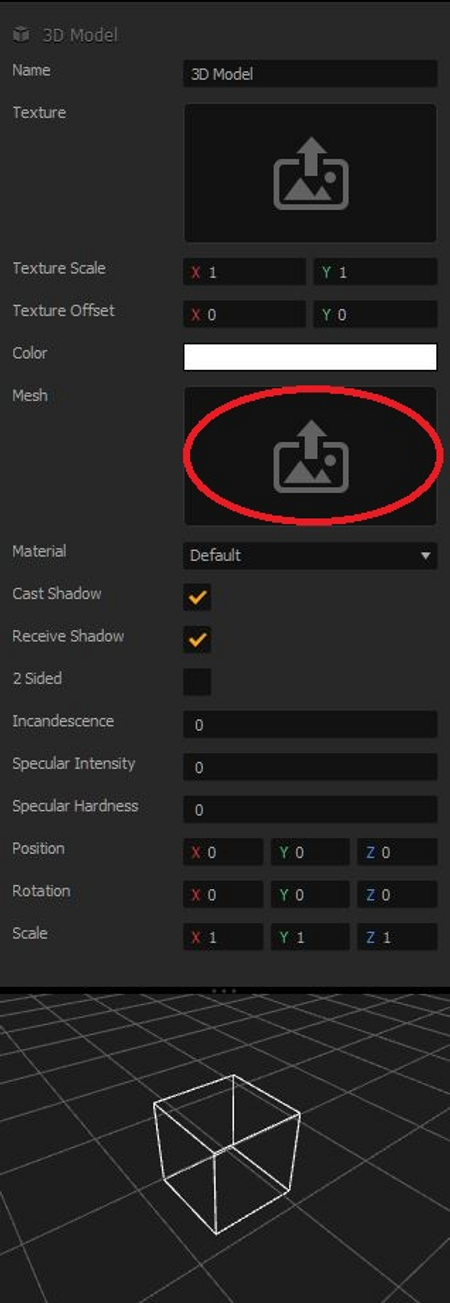
Once your mouse is over that icon, you will notice a pencil icon in the top right corner. Click on it, which will bring up the "Mesh Manager". From the Mesh Manager, click "Plane", then "Save".
Right now, the color of the plane is white, as you can see in the lower right corner. To change this, click on the area next to "Color" and give it the color you gave "Ground" asset. Don't worry if the color of the plane does not exactly match the ground color. They do not affect each other in any way.
The last thing we need to do before we return to the scene is change the rotation of X to 90. This allows the plane to be visible to the player.
In the next lesson, we are going to add the ground to our scene and create an environment for the user to play in.