Beards, Goatees, and More
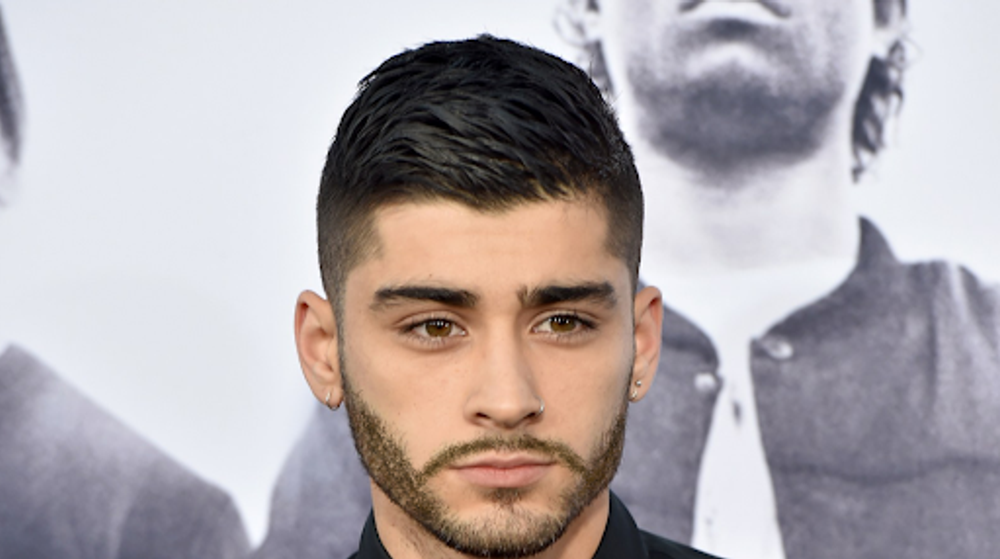
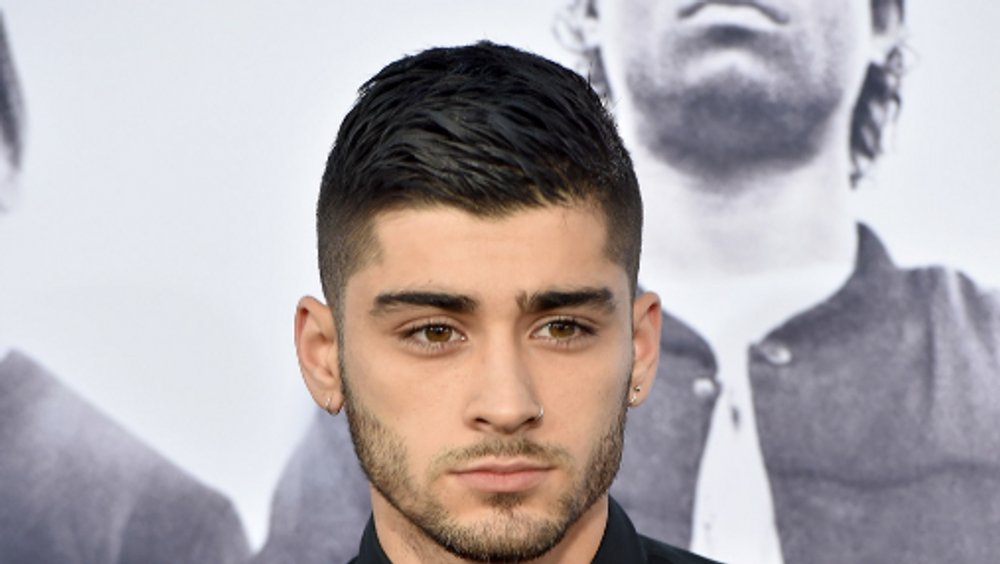
So another sought out topic in Photoshop is the creation of fake facial hair on a person. You can finally see how you would look if you had a beard. This is somewhat of a complex process, but it is generally easy. First, you want to get a photo of a person with a little bit of facial hair. The image below is the image I will be using, but feel free to use any other photo.
Gotta get those Layers down
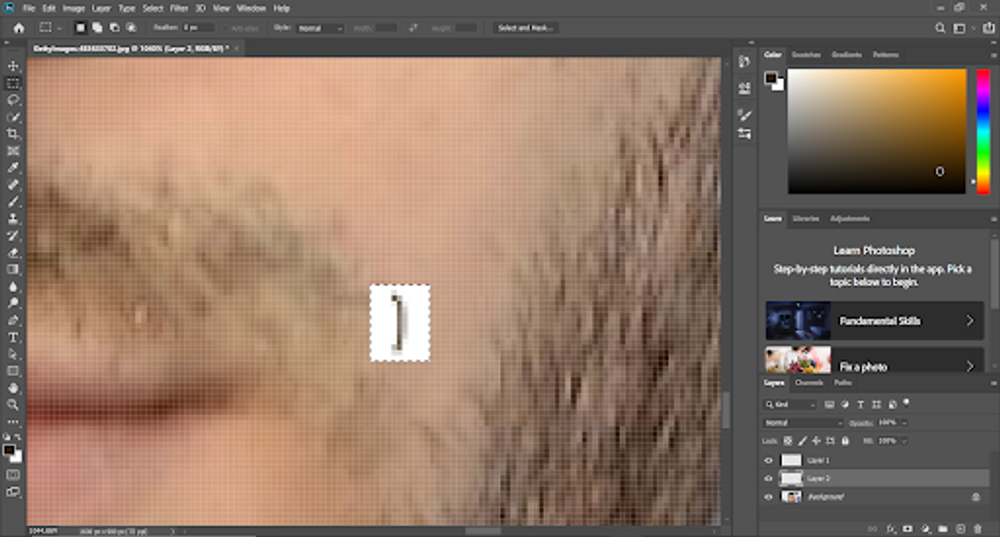
As you can guess, you are going to need to create a layer before you even start. Once you have done this you want to grab the paintbrush tool. We are creating our own paintbrush that will provide us with facial hair. The first thing you need to do is right-click and change the brush settings. Change the pixel size to 1 point and change the hardness slider to 100%. This will give you the easiest/best chance of creating a good “piece of hair”. Once you have adjusted the sliders, you want to zoom as close as you can to the jaw section. Now take you brush and paint a piece of hair. If you want to check that the hair looks “real”, just move the hair into the beard area. If you lose the hair, then you have done a good job(to get the hair back just Undo). Now, take the Marquee Rectangle Tool and draw a box around the hair. Once you have done this, hold Control/Command and Backspace/Delete. A pop-up box should show up, Change the first drop down to white. Now grab layer 2 and drag it under layer 1 so you can see your hair. Your page should look like this.
Creating a Brush
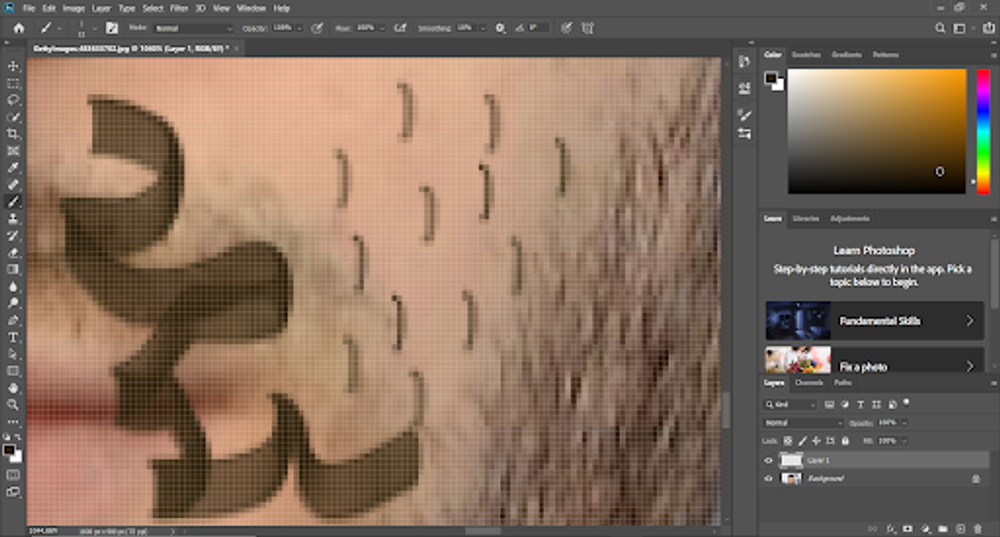
Once you have created this white pane, you want to create a brush with this hair. The reason we made a white pane was because we didn’t want the brush to pick up any additional coloring. Select the layer that the hair is one by clicking the icon in the layer tab. Now, select the Edit tab, and select Define Brush Preset. Once you have done this, the paint brush should have turned into the shape of the hair you created, play around with the brush you just created by just clicking and dragging the brush. You can also now delete all the layers and create a new one because we have created our brush.
Making it Fancy
As you can see, this is not what facial hair looks like. Facial hair is curved, has gradients, has different sizes, and different colors. To do this, you are going to first go to the left or right of the face. This area will become our test area for the next few steps. Now select the Window tab, and then select brush settings.
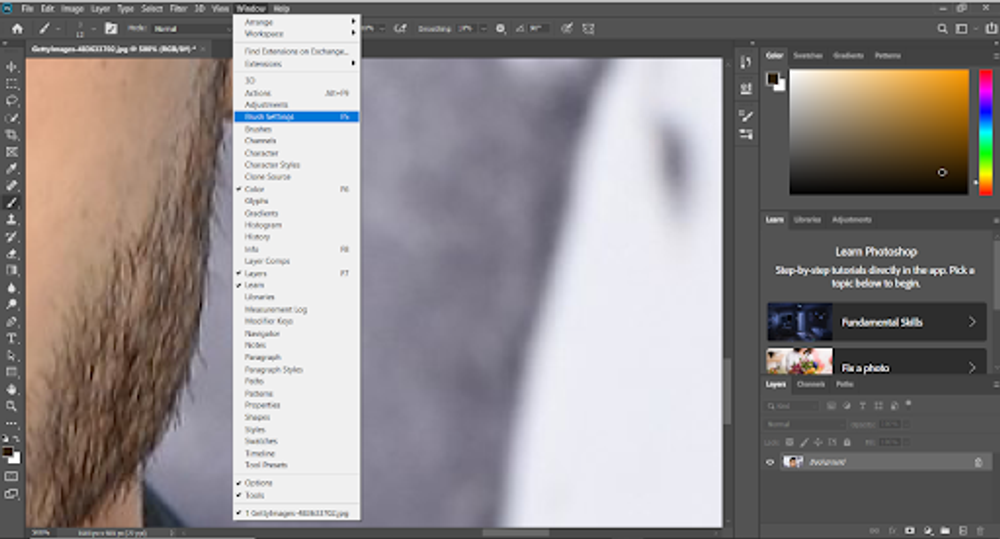
Fixing it Up
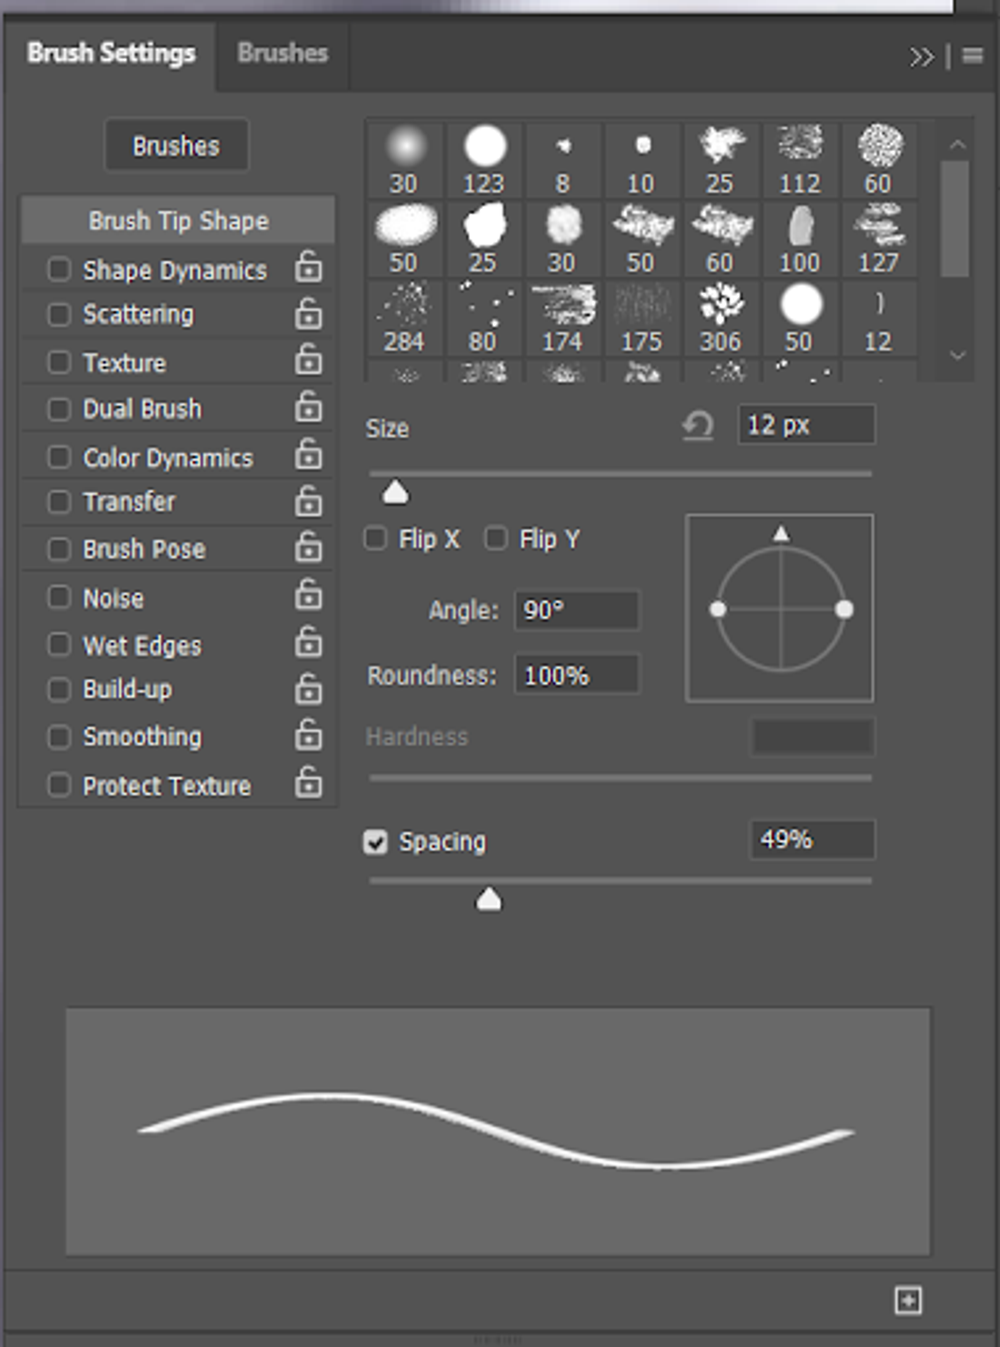
Once you have pulled up this menu, a lot of options will be presented to allow you to edit each aspect of the brush one by one. The First thing you want to do is to change the angle degree to 90. Once you have done that, you can change the Spacing setting to around 50%
Your screen should look like this.
Shape Dynamics
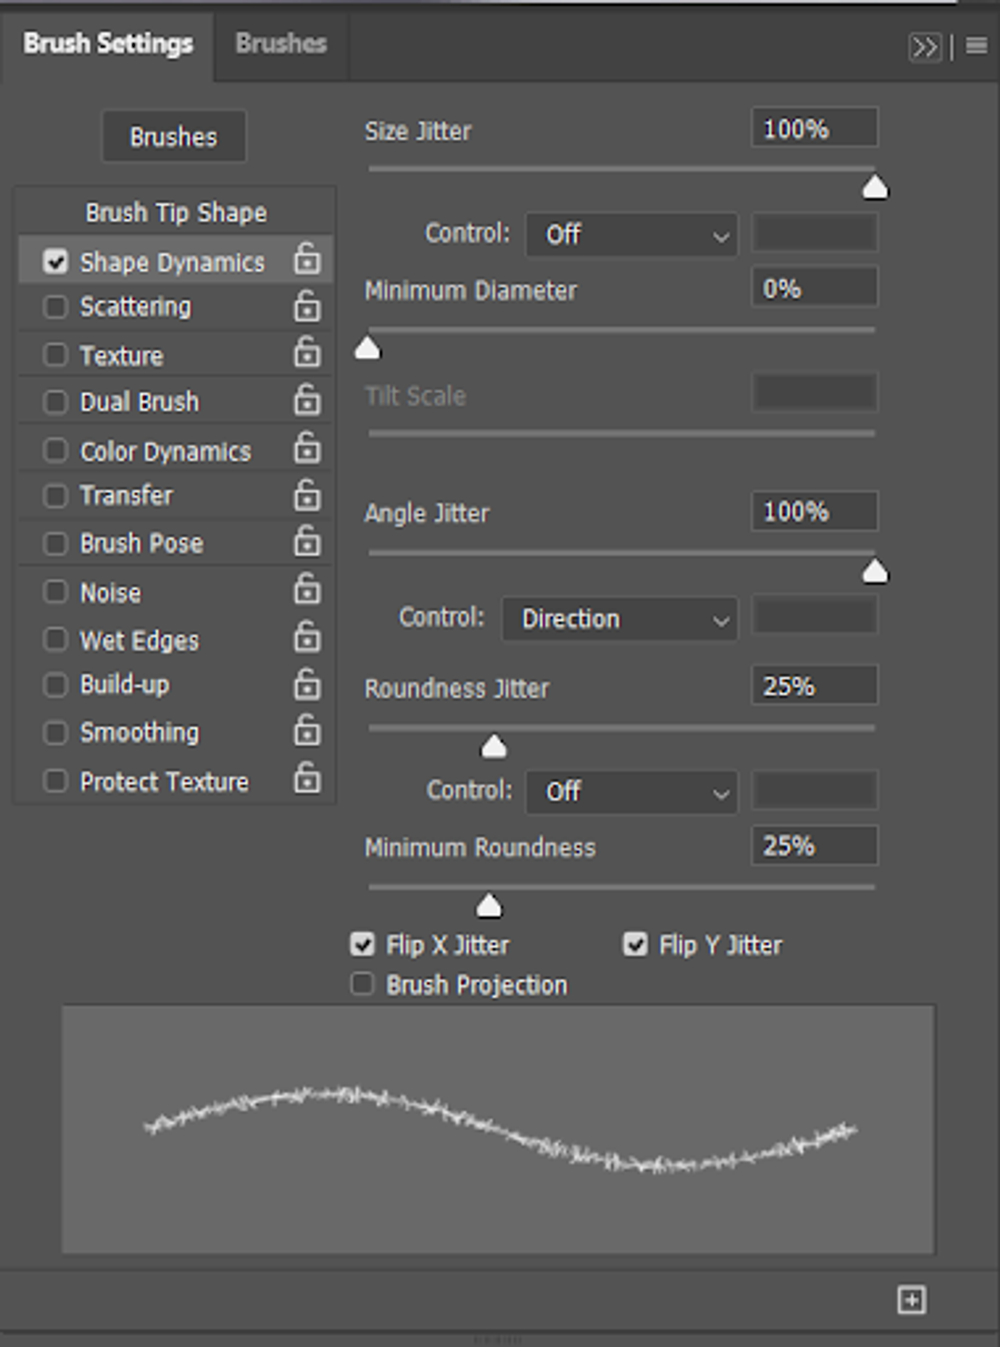
For Shape Dynamics, the first things you should do is put the size and angle jitters both up to the maximum slider. Once you have done this, you can test the brush to the side, the hairs should now have different sizes and have different angle looks. After that, set the Control drop down to Direction. Because you made the angle 90 degrees, the hairs now move in the direction that you trace them in. You want to also put the roundness jitter and minimum roundness up to around 25%. Finally, for this check box, select the x and y-axis jitters. Your screen should look somewhat like this, having the measurements exact is not super necessary.
Scattering
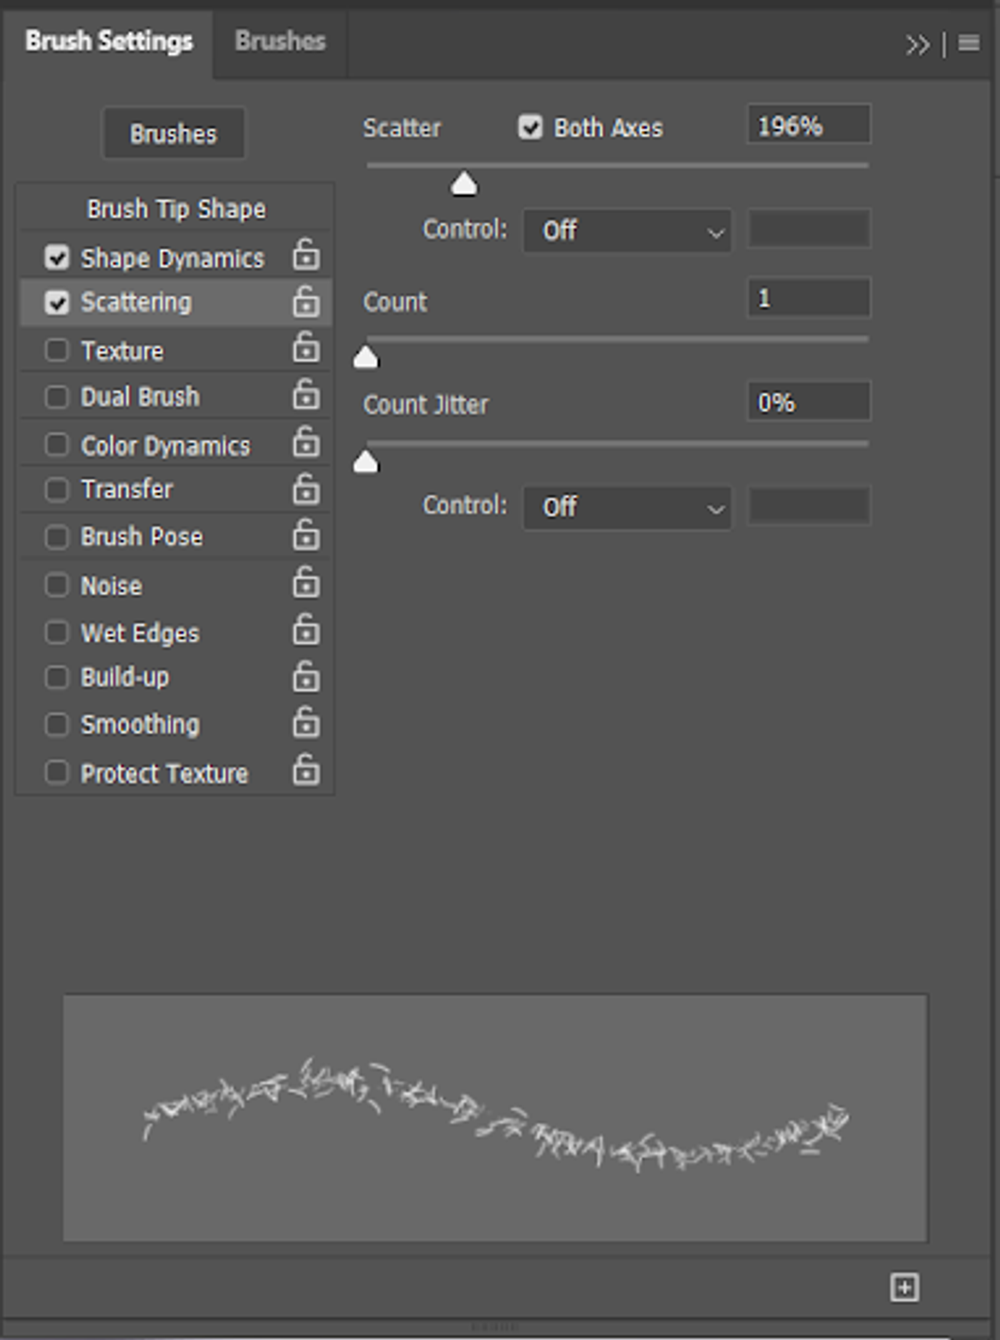
The Scattering section isn’t that large and will only take you the matter of a few seconds. Each hair does not grow in a straight line and in the same spot. To create variation, you will need to select the both axis box in the top right corner of the scatter page. This will scatter the hairs in all directions. You will also need to increase the scatter amount to around 200%. The reason we do this is so we can spread the hairs out by about double.
Transfer
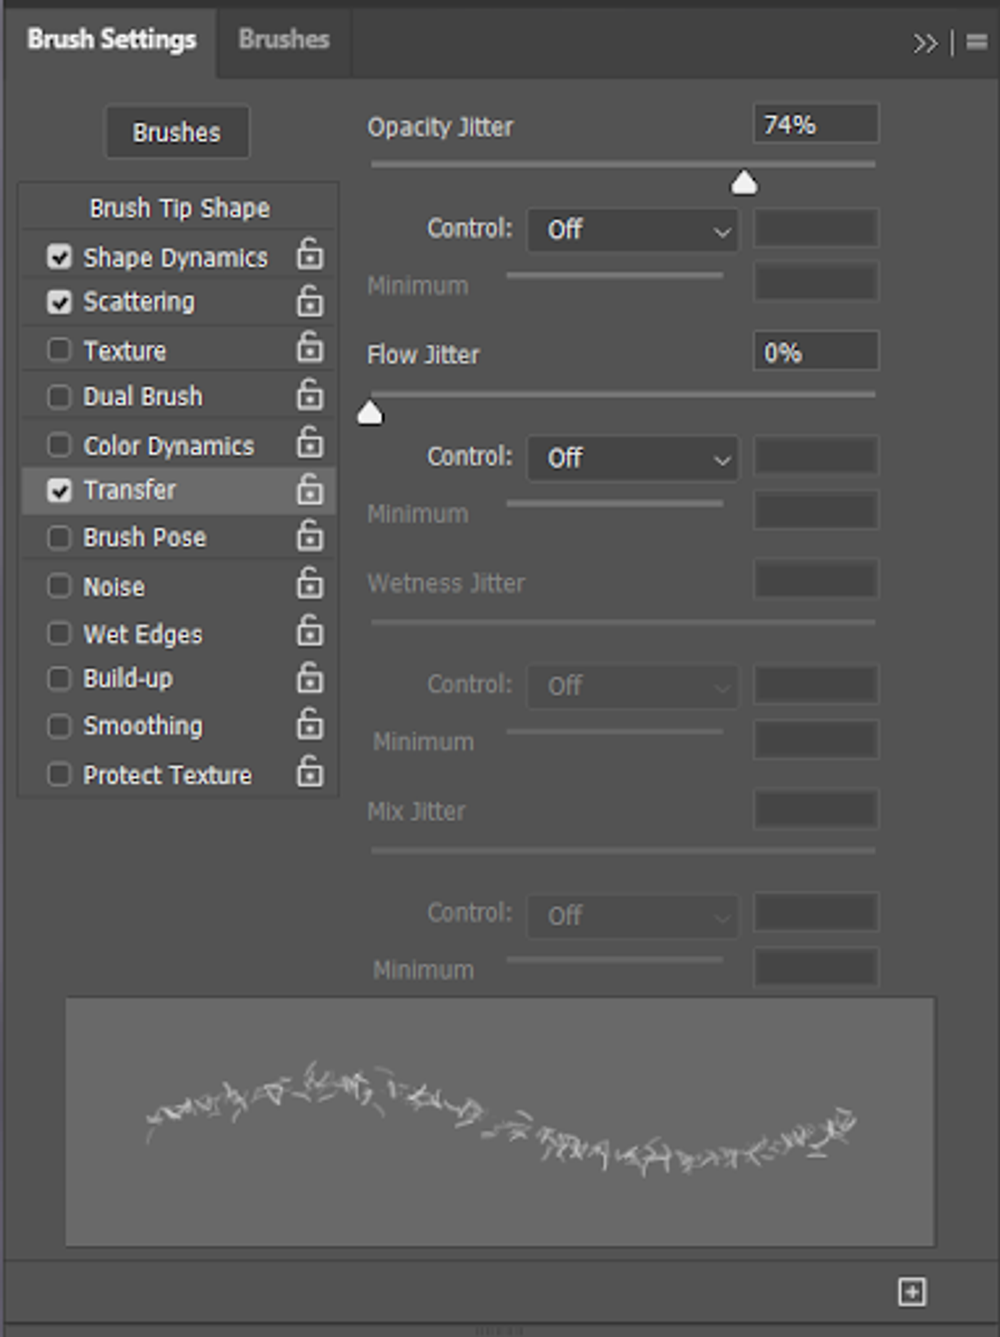
The Transfer tab is a really cool tool that allows us to modify the amount of hair shown and the amount of hair in a specific area. When you select the tab, you want to make sure that all the dropdowns are set to off. Once you have done this, you want to also want to make sure that none of the other sliders are on. After all of this, you just want to turn your Opacity Jitter to around 75%. This will make sure that some of the hairs are less visible than the others.
Smoothing
The Smoothing check-box will be the final box you will be using in this brush. This sure that all the hairs are align and are straight. This box does not pull up any menus and does not require any other adjustments. Once you are done, this is what your screen should look like.
N/A (please put in image)
Time to Paint
Once you have finished your brush, you can just simply start painting in the beard. Because this is just a regular brush, we can change the colors as we please. This means that we can adjust the color differences with one’s hair in the photo. The image below is the before and after images. As you can see, with just some simple steps we were able to give this man a really nice looking beard.
N/A (please put in image)