Line Tools
The line tool does exactly what you think it does, it creates lines!
To create a basic straight line, click on the icon of a pen located on the left sidebar. When you click the icon, click on the first variation tool that pops up next to the tool. Then, find where you want to begin your line and click there. After selecting the startpoint, drag and release your cursor until you end the line. Though you can see the length of your line using the measurement tool at the right hand side of the status bar, dragging the cursor will likely result in much less precise lines in terms of length.
To create more exact, accurate lengthened lines, you can start off by clicking at the startpoint and then hovering your cursor in the direction you want the line to go. Then, just enter the length of the line and hit enter. Make sure to think about the scale of your model and the workspace when entering the numbers for the length of the line because the measurements for the line is in terms of the scale you chose for the workspace.
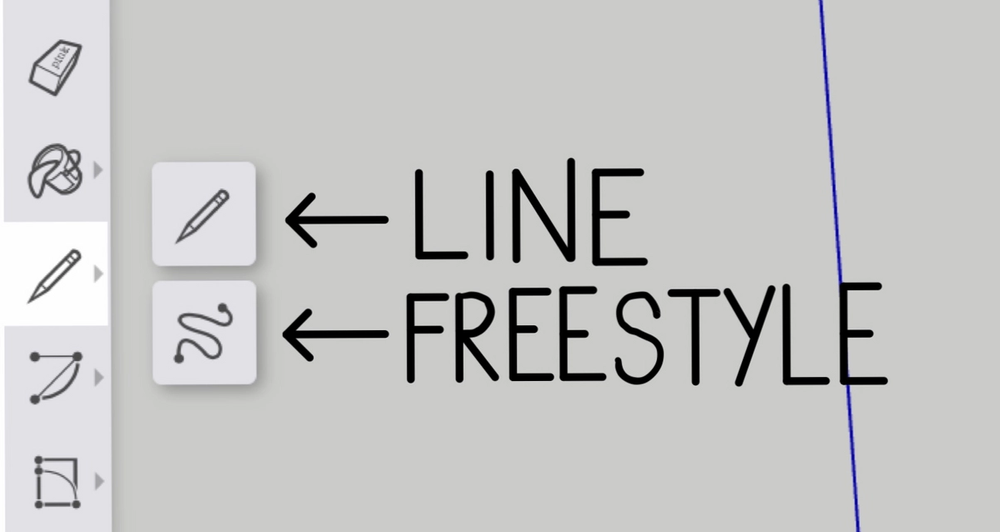
The second variation tool with the dots and curved drawing alongside the pen icon is the Freestyle tool. This tool is used to create 2D drawings involving curves. This tool is fairly easy to use: click and drag your cursor and then draw your design.
Arc Tools
There are 4 versions of the arc tool:
- The Standard Arc
- 2 Point Arc
- 3 Point Arch
- Pie
The 4 variations of the arc tool appear when you click on the tool with the icon of an arc on the main toolbar.
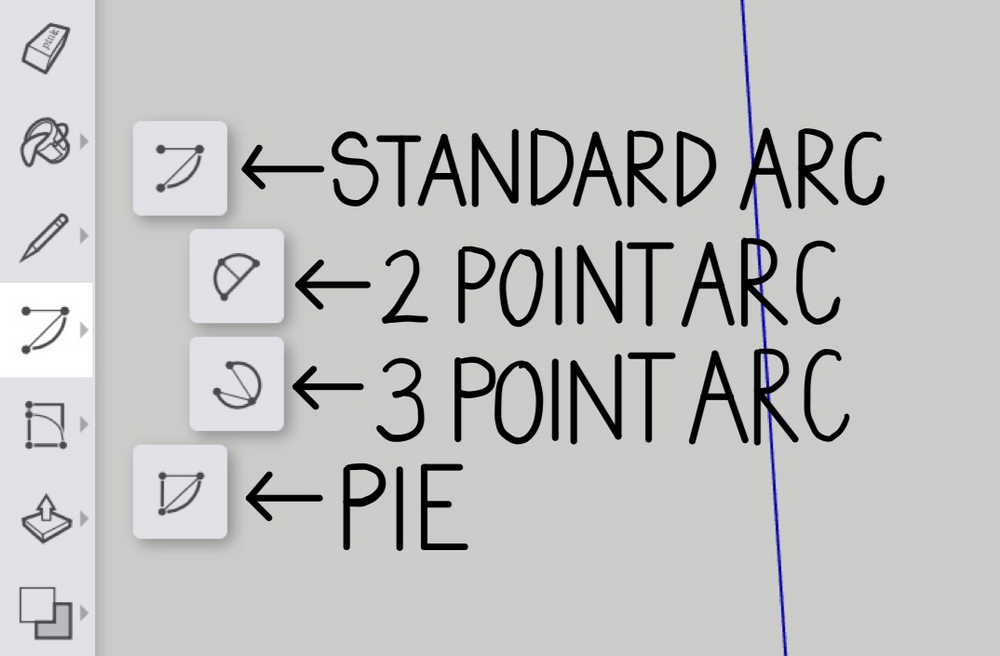
All of these tools create arcs, however, each variation of the arc tool may have a slight difference in the process of creating the arc or the end result. You may need to try using each tool to figure out which one works best for your design.
The Standard Arc tool is the original, and first variation tool of the arc tool. After selecting the “Standard Arc” tool, click where you would like to have the center point of your arc. To select the radius of the arc, you need to point the cursor in the direction you want the startpoint of the arc to be and then either enter a measurement on your keyboard or drag your cursor away from the center of the protractor. Then, you can either enter another measurement for the angle of the arc or click where you want the other endpoint of the arc to be.
The 2 Point Arc tool is the second variation of the arc tool, right below the Standard Arc tool. To begin creating the arc, click where you want to place the starting point of the arc. Then, you can either enter a length for the distance between the starting and ending point of the arc or click on the position of the ending point. After selecting the positions and distance between the starting and end points of the arc, you can determine the length of the bulge of the arc. You can either type the length of the bulge and click enter or drag your cursor till you get the right distance.
Another way to create an arch in SketchUp is using the 3 Point Arc tool. The 3 Point Arc tool is the 3rd variation tool of the arc tool. Click where you want the startpoint of the arc to be located. Then, you can move your cursor and click where you want the second point of the arc to be. The second point is the point that the arc will always go through or end at. After you select the second point of the arc you can move your cursor and click at the endpoint of the arc. You can also type the angle of the arc and click enter.
The Pie tool is the last variation of the arc tool. The process of creating an arc using the Pie tool is the same as that of the Standard Arc tool. While the Standard Arc tool just creates an arc, the Pie tool encloses the space of the arc and fills in the space in the shape of a slice of pie.
Shape Tools
The first shape tool we will learn how to use is the Rectangle tool. The shape tool is the 6th tool on the main toolbar with the icon of a rectangle. To select the Rectangle tool, click the first variation tool after clicking on the shape tool.
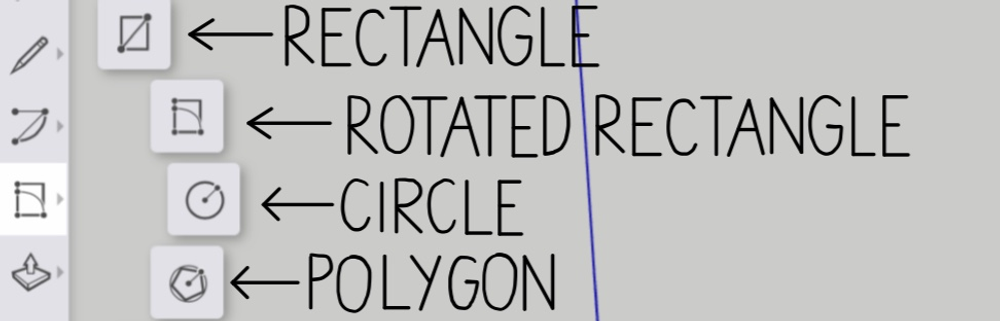
To create a rectangle in the workspace, you can click where you would like one of the corners of the rectangle to be. Then, you can move your cursor diagonally in the direction you would like the opposite corner of the rectangle to be. Once the second corner is selected, the rectangle will automatically be created in the workspace.
The Rotated Rectangle tool is another way to create rectangles. This tool is normally used to create rectangles in different axes. The Rotated Rectangle tool is the second variation tool from the shape tool found in the main toolbar. After selecting the tool, you can click where you want the first corner of the rectangle to be. After selecting the first corner, you can use the protractor tool and drag your cursor around the protractor or enter the measurement for an angle to get a precise and accurate measurement for the direction of the first edge. After you get the right angle and length of the edge, you can click and set the second corner of the rectangle.
The third variation of the shape tool is the Circle tool. The circle tool is very easy to use. You can start off by clicking to choose the center point of the circle. After selecting the center point, you can either type a measurement and click enter or drag your cursor to select the radius of the circle. After doing so, your circle will be created. The “Polygon” tool is the fourth variation of the shape tool found in the main toolbar.
The Polygon tool is used the same as the Circle tool. You first need to select the center of the polygon and then choose the radius of the polygon. You can choose the length of the radius by typing the measurement and hitting enter or dragging your cursor out from the center of the polygon to set the polygon’s radius. If you need to alter the number of edges of the polygon, click the Instructor panel and look at the modifier keys.